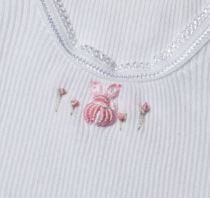
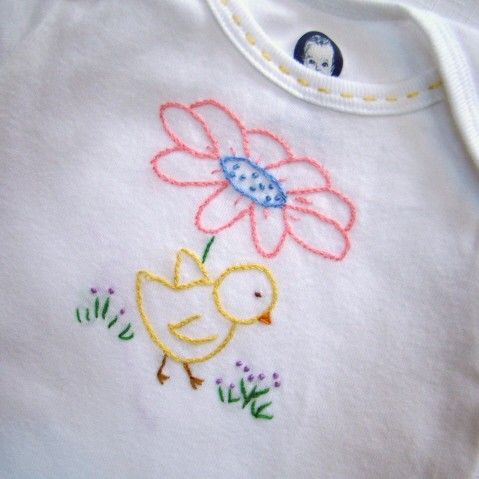
You want to add a little embroidered motif to a T-shirt? You have to stitch on knit! Baby goods – like onesies and receiving blankets – are often knit, so if you want to embellish them with a personal touch, you’ll want to know how to stitch on knit.
If you’re interested in embellishing knit fabrics with little bits of embroidery (or big bits!), then read on! I’ll share with you my recent adventures in embroidering ducks on baby goods, throwing in a few tips and observations along the way.
Have you ever tried to hand embroider on knit fabric, only to end up with a puckered mess?
Knit is not exactly the best fabric in the world to use as a ground for hand embroidery, but there are times when knit fabric can’t be avoided for certain embroidery projects.
PIN IT
The design I’m embroidering in this article is the same duck design I showed you last week, which I worked up on a piece of linen, to see how it would go.
It was a lot easier on linen! And it took less time.
I won’t kid you into thinking that hand embroidery on knit is a breeze, because, at first, it isn’t. But once you get used to it – once you get the feel for the fabric you’re working on and how the needle and thread interact with the fabric – it becomes easier.
If you’re not used to embroidering on knit, it’s not unusual to feel frustrated at first, or worried that it’s not going to come out, or worried that you’re doing something wrong. Just keep going. If you mind a few tips along the way, you should end up with a passable end product – and the next time you do it, it’ll be significantly easier.
In short, don’t let the fabric intimidate you.
When you embroider on knit, a non-stretchy stabilizer is essential. I like to use Sticky Fabri-Solvy, though you can use other stabilizers on the back of the fabric.
Why Sticky Fabri-Solvy? It goes on the front of the fabric, you can print the design on it (eliminating the whole design transfer process), and at the end, it washes away and you never know it was even there.
Whatever stabilizer you decide to use, the point of the stabilizer is this: You want to keep the knit from stretching while you’re doing the embroidery. So choose a stabilizer that adheres to the fabric (either because you can iron it on or stick it on) that will keep the knit from stretching while you’re stitching on it.
Needle Emery
One thing that’s good to have on hand if you’re using this particular stabilizer (or even some iron-on stabilizers) is a needle emery. Sticky Fabri-Solvy is not supposed to gum up your needle while you stitch through it, but the fact is, it does. And this can be especially problematic when working on knits (which can adhere to the gummy needle and stretch away from the interfacing) and when working a stitch like a bullion knot, where a gummy needle will get stuck in the wraps.
Running your needle through the emery every now and then will make the process of stitching a lot easier.
You’ll want a hoop that can accommodate your stitching space, more or less. If you don’t have to move your hoop around on the project, you’ll end up with a better end result.
For the Carter’s onesie I’m stitching, I used a 3″ hoop (that’s the center hoop above). I used the 4″ hoop as a pattern guideline for the Solvy, because the stabilizer needs to extend beyond the hoop.
So, I drew a large circle on the front of the Solvy, using my 4″ hoop as a guide, and then I sketched my design in light pencil on the stabilizer.
You can print on the Sticky Fabri-Solvy, but my design is very basic:
…so I didn’t bother printing the solvy. I just doodled it on.
Once the design was on the solvy, I cut out the large circle, centered the design on the onesie, peeled off the back of the stabilizer, and stuck it on the fabric.
Then, I just hooped up the fabric with the stabilizer stuck to it, as normal, making sure the stabilizer extended beyond the edge of the hoop.
Now we’re ready to stitch!
You have two access points on the onesie – the neck, which is microscopic, and the snaps between the legs, which are a long way away from the stitching area.
I accessed the hoop from the neck of the onesie, which doesn’t give a whole lot of space for manipulating long milliner needles. It also makes it difficult to start and end threads, especially in a 3″ hoop.
On a larger project – a T-shirt or a blanket, for example – this wouldn’t be a problem, but if you’re stitching on something tiny, you may find it really difficult to get inside the thing to end threads on the back.
When it’s time to end a thread, I take my milliner needle (ideal for bullions) off the thread and switch to a tapestry petit, which is tiny, compared to the milliner needle.
Using the tapestry petit needle, I can access the backs of the stitches inside the small hoop, inside the small neck of the onesie, much more easily, and end my threads off by whipping around the backs of the thread and cinching.
Guffaw, guffaw, guffaw…chortle, chortle!
The right hand duck ended up a little plumper than intended. His face is squished, and the poor guy looks like he’s freezing cold!
But never fear! We haven’t stitched his environment yet!
Instead of picking him out, I decided to keep going.
Knit is not the most forgiving fabric in the world, when you make a mistake. It’s hard to pick stitches out of it, they can leave visible marks when removed, and it’s easy to break or snip the fabric threads if you pick up just one little stretchy thread while you’re snipping and pulling out stitches.
My first bullions on this project look like….like… (I don’t think I’m allowed to say it on here!)
They look pretty bad. The middle duck (on the right) was my first attempt. The duck on the left is slightly better.
Whenever I work bullion knots, it takes me a few knots to get into the swing of them. So for those of you who bemoan the supposed inaccessibility of the bullion, don’t worry about it! Just keep trying it – work a lot of them! – and eventually, they’ll start coming out right. When I sit down to stitch bullions, my first ones never look too red hot.
So, forward!!
Here are the ducks, out of the hoop. You can definitely see the hoop ring there, and that’s further enhanced by the stabilizer.
How do you like that third perfectly perpinduckular fellow on the right? He’s a bit wonky, too!
that’s going with this gift.
With the receiving blanket, I can use a larger hoop, and I don’t have to access the hoop through a little neck hole. Comparatively speaking, this will be a breeze!
Remember that the Solvy needs to extend beyond the hoop. You can see it sticking out around the hoop in the photo above.
That’s ok! Forward!
I took this onesie to the kitchen and left it in a bowl of water to soak, to remove the Solvy. While it was soaking, I went back to my workroom and set up the receiving blanket
And here they are, taking shape on the receiving blanket.
The cattails have a little pucker around them, even in the hoop – I’m not worried about that. Everything will relax once soaked.
The embroidery on the receiving blanket went much faster than the embroidery on the onesie, for two reasons: 1. I wasn’t accessing the back of the hoop through a tiny neck hole; and 2. I had developed that stitching rhythm you get, once you really get into a project. It makes a difference!
The onesie was in the dryer with a load of whites while I stitched this thing. I tossed it into the laundry with some whites, and put them through a regular wash and dryer cycle.
Remember, this is for a baby! It needs to be able to pass through the laundry relatively unscathed, so I wanted to test how the bullions and the design and the fabric would all hold up. Would it pucker? Would the bullions go all weird on me?
Guess what? It came out great! Even the middle duck doesn’t look too bizarre!
The Solvy did its job – no puckers in the knit – and the bullions held up the laundry just fine.
Tips for Hand Embroidery on Knit
Here are my tips for hand embroidering on knit, in a nutshell:
- Use a stabilizer that adheres to the knit and keeps it from stretching.
- Make sure the stabilizer extends beyond the edge of your hoop.
- Keep a needle emery on hand, in case your needle gets gummy.
- Be aware of what’s happening on the back of your fabric. Sometimes, the knit will separate from the interfacing as you push the needle through, especially if the needle has gotten gummy.
- Be aware of what’s happening with the threads, too, just in case slip knots form on the back. If you’re embellishing a blanket or something similar, remember that the backs of the stitches will be exposed.
Now, go forth and embellish all your knit fabrics with hand embroidery! Kick that T-shirt up a notch! Why knot?
www.needlenthread.com


